Wind-Powered Cars
Building a wind-powered car challenges students to turn a limited set of materials into a machine that can travel using only wind from a box fan. Students work in groups of two. Each pair combines its materials, designs one car, and tests how far it travels.
This lesson introduces force, motion, friction, stability, and iteration. The challenge is intentionally open-ended: there is no required car design, and every group must solve the same problem using only the materials provided.
Plan approximately 40 minutes for designing and building and 20 minutes for testing.
Group Structure
This is a partner activity, not an individual build. Assign every student to a group of two, and have each pair build and test one shared car. Each student receives an individual material set, so every group begins with two complete sets of the listed supplies.
Materials
For each student
Each student receives the following supplies. Because students work in groups of two, partners can combine both sets to build one car.
- One 12 × 4-inch piece of cardboard for the car body
- Four wheels
- Two axles
- Two sheets of 8.5 × 11-inch paper
- Two drinking straws
- Four craft sticks
- One foot of blue painter’s tape
Do not provide a step-by-step kit or unlimited replacement material at the beginning. Working within these limits is the main engineering challenge.
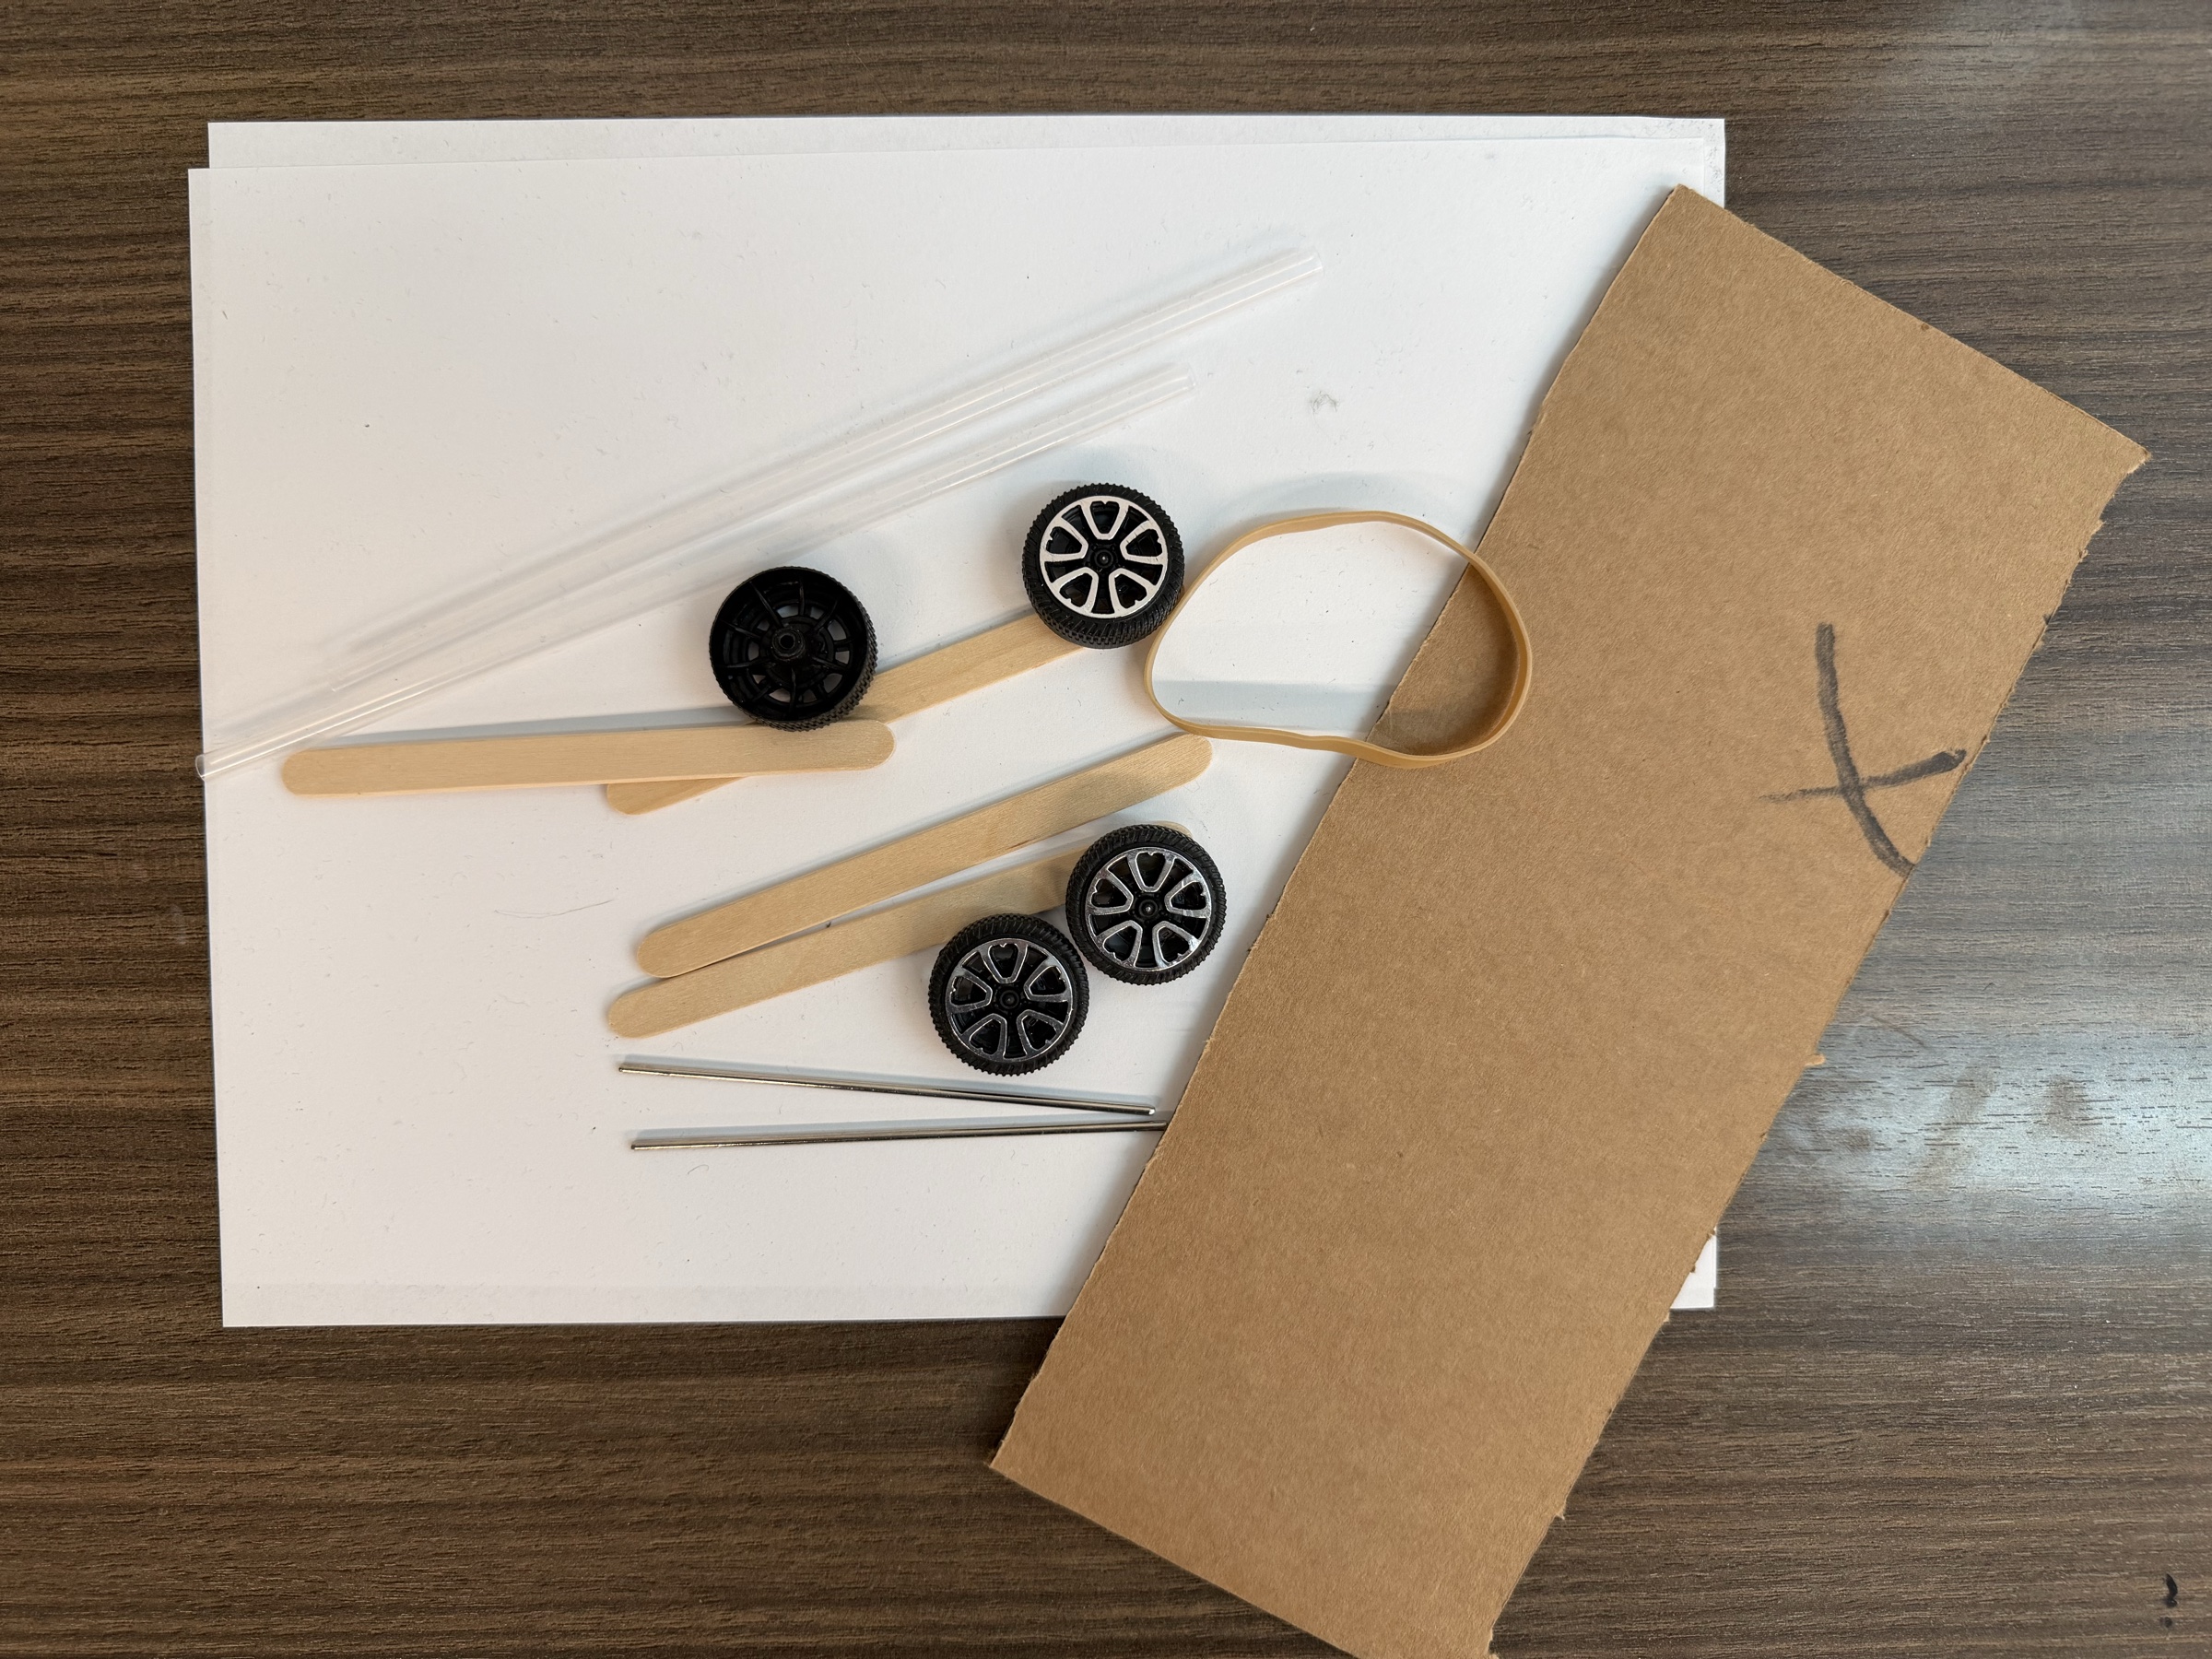
Prepare the same measured set of materials for every student. Partners combine their supplies when they begin building.
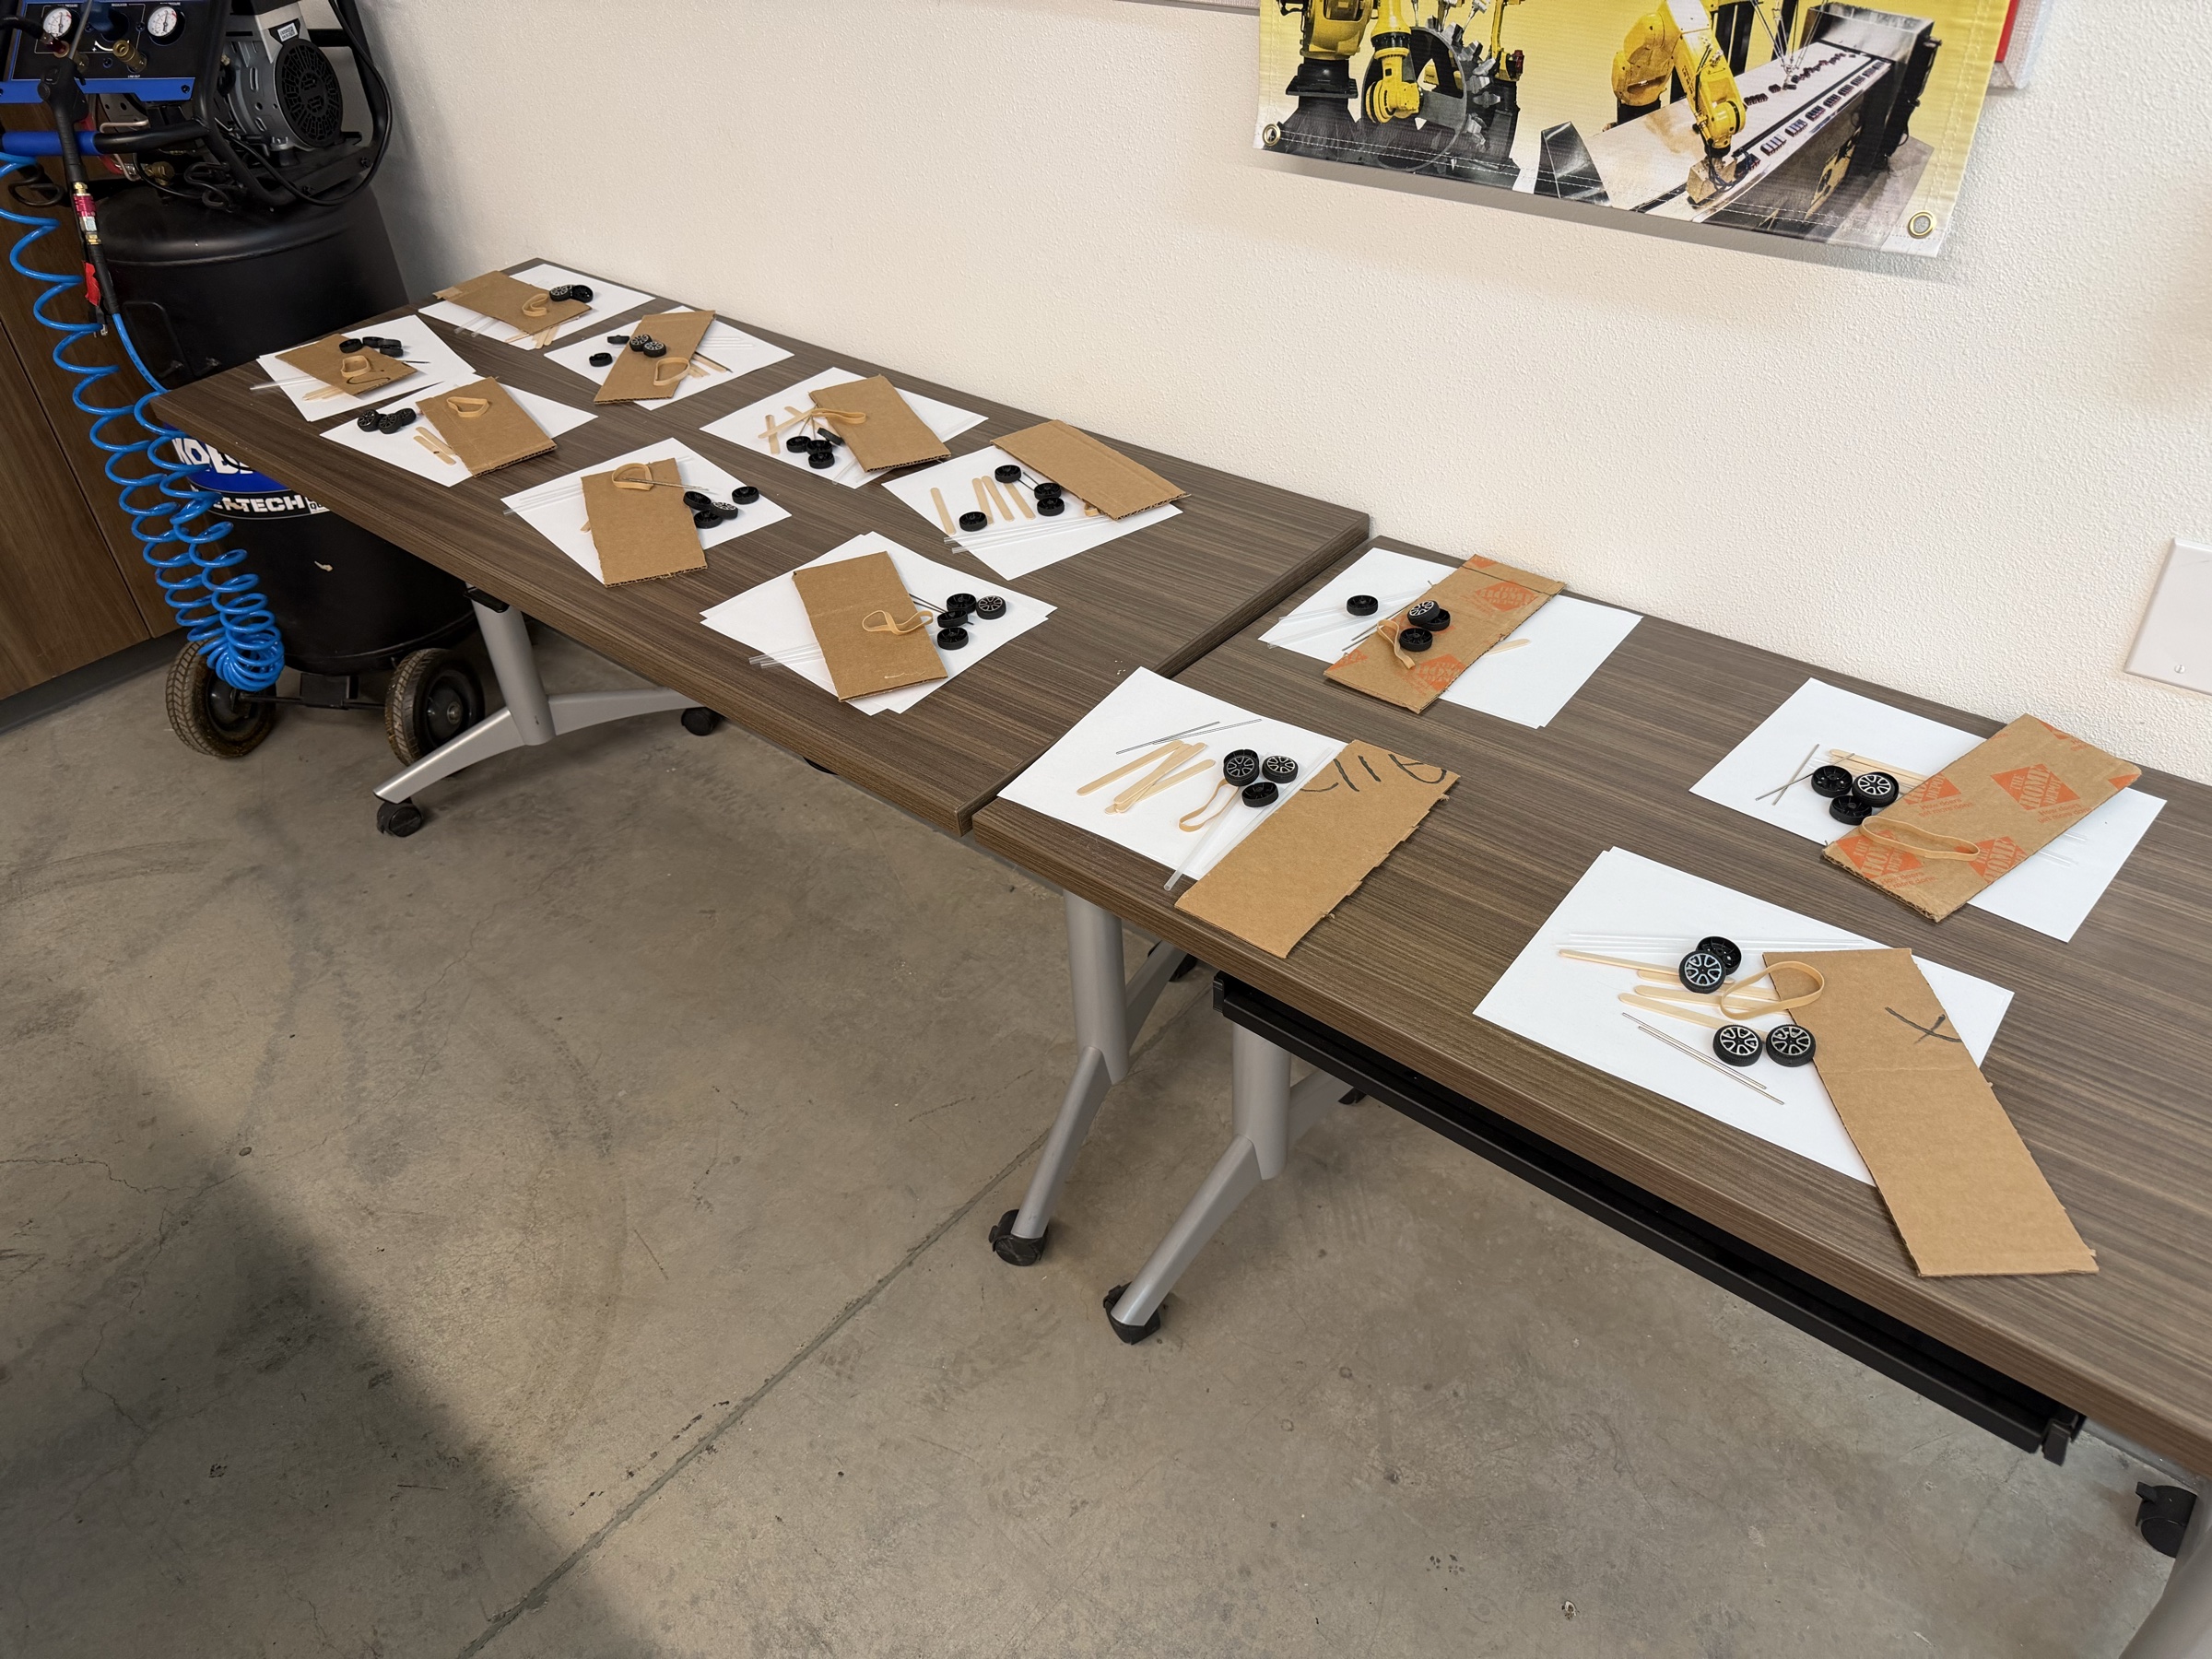
Laying out the materials before students arrive makes it easy to check that every student receives the same starting supplies.
For the instructor
- A way to project your screen (projector, classroom TV, etc.)
- One basic but functional demonstration car
- One box fan
- Two 25-foot tape measures
- Blue painter’s tape for the starting line
- A long, flat hallway or similar testing area
- Scissors and other shared classroom tools
- A clipboard, paper, or spreadsheet for recording distances
- Extra parts for damaged or defective supplies
- At least one camp staff member to measure and record each result
Recommended Wheels and Axles
We used this wheel-and-axle set and recommend it for the activity. Product listings can change, so the screenshot below is included as a visual reference for the parts we used.
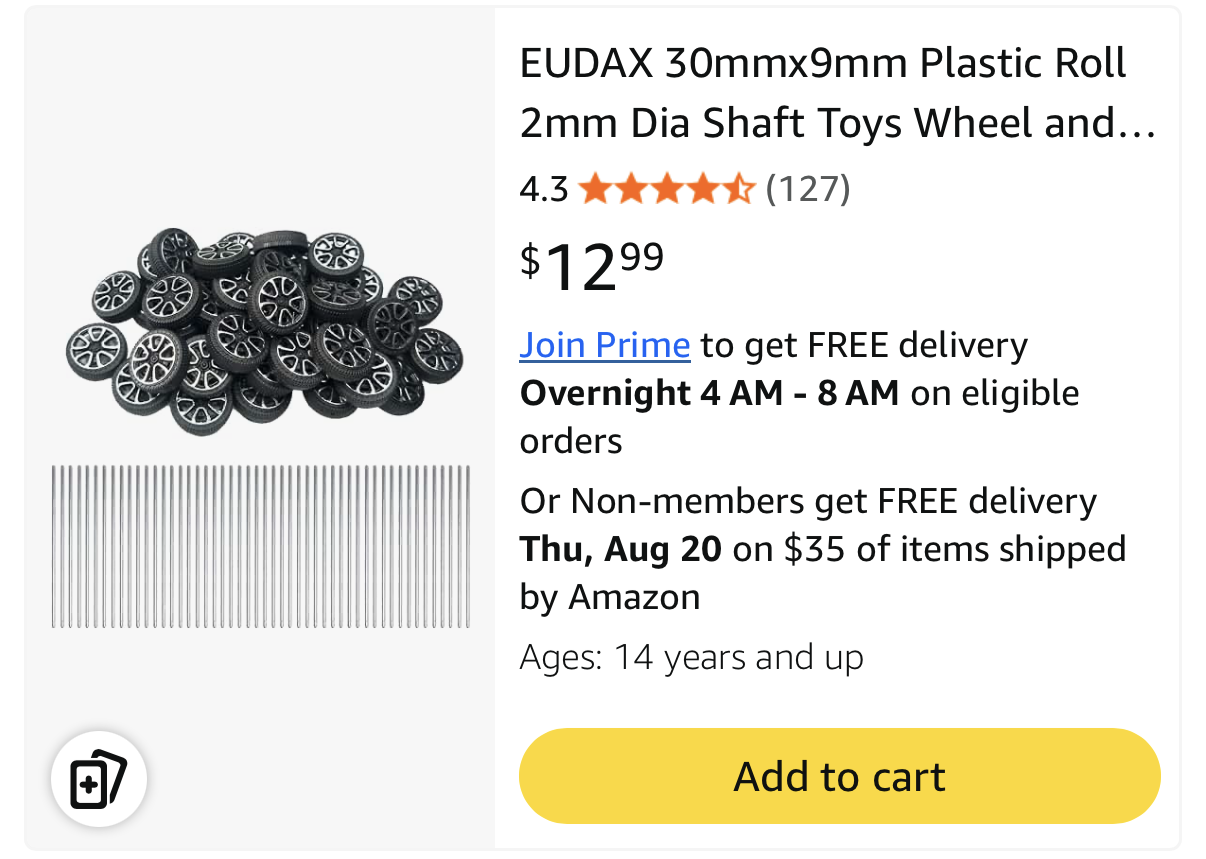
The wheels and metal axles used for our cars. Follow the product link when it is available, or use the screenshot to find a comparable set.
Recommended Fan
We recommend this 20-inch box fan, but any generic box fan that produces a steady airflow should work. Use the same fan position and speed for every group so the distance results can be compared fairly.
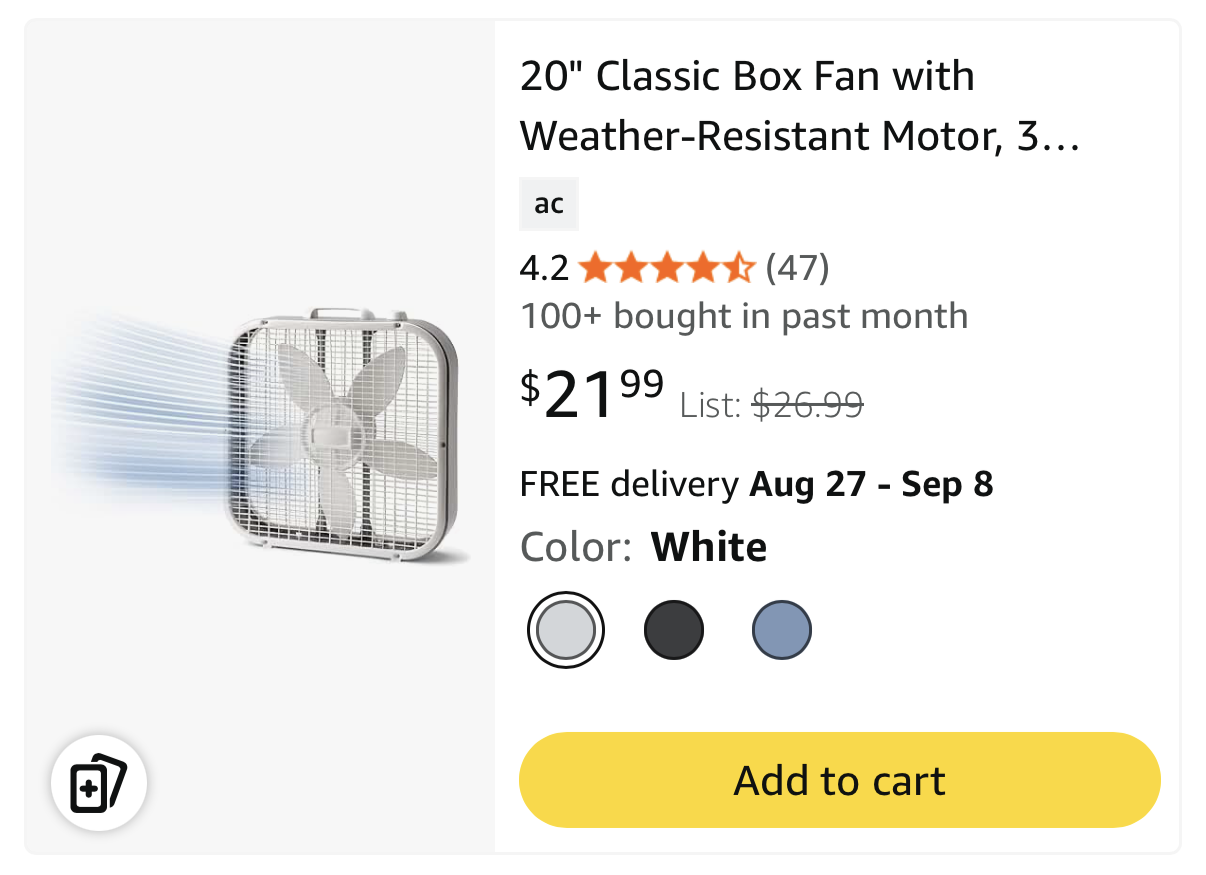
The recommended box fan. A different box fan is fine as long as it can remain in the same position and setting throughout the challenge.
Before You Begin
Build one basic but functional wind-powered car before camp. The example should roll reliably and move when placed in front of the fan, but it does not need to be highly optimized. Use it to help students observe how the wheels, axles, body, and sail work together, not as a design they must copy.
Test the example using the exact fan, fan setting, floor, and starting position planned for the challenge. This confirms that the setup produces enough wind and gives the instructor a sense of the distances students may reach.
Divide students into groups of two. Prepare two student material sets for each group and keep only a small supply of replacement parts for items that are damaged or defective.
Example Instructor Car
Our instructor example used a cardboard base, straw axle supports, four wheels, a craft-stick mast, and two sheets of paper for the sail. It was intentionally simple and made from the same types of materials available to students. Show both the complete car and its underside so students can see how a working design keeps the axles parallel while allowing the wheels to rotate.
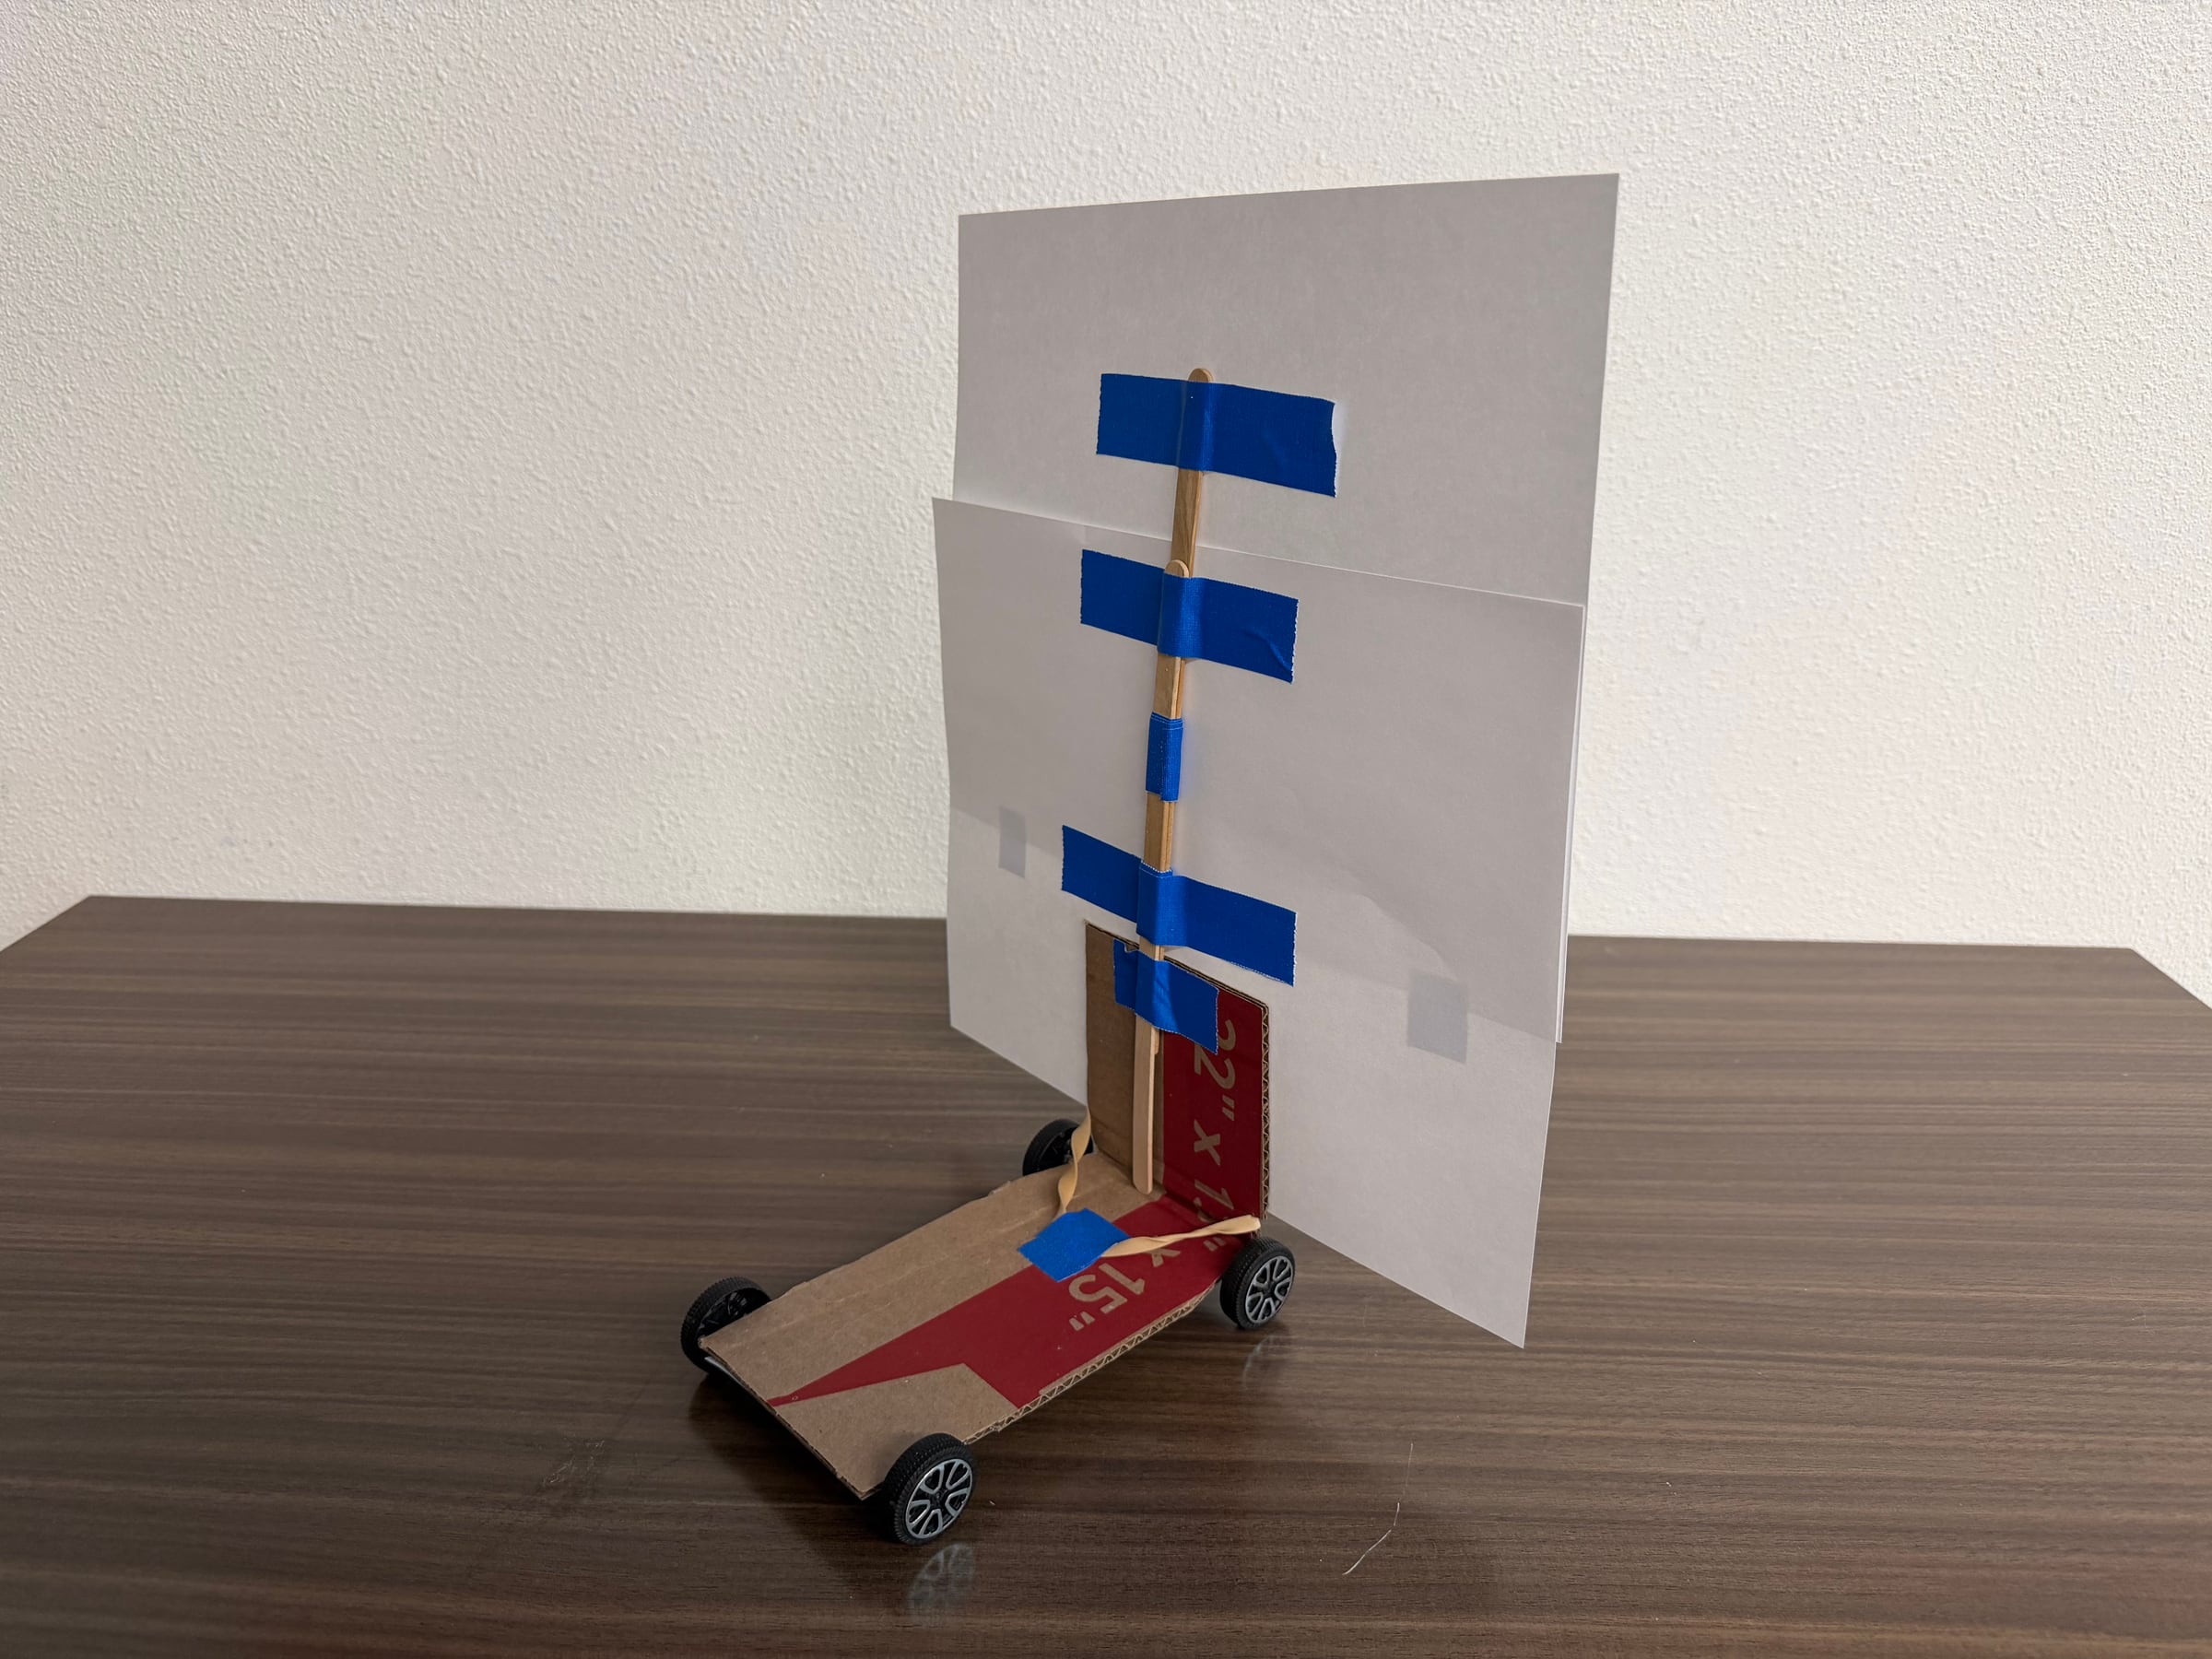
The instructor example demonstrates one functional arrangement of the body, mast, and sail. Students should treat it as a reference, not a design they must copy.
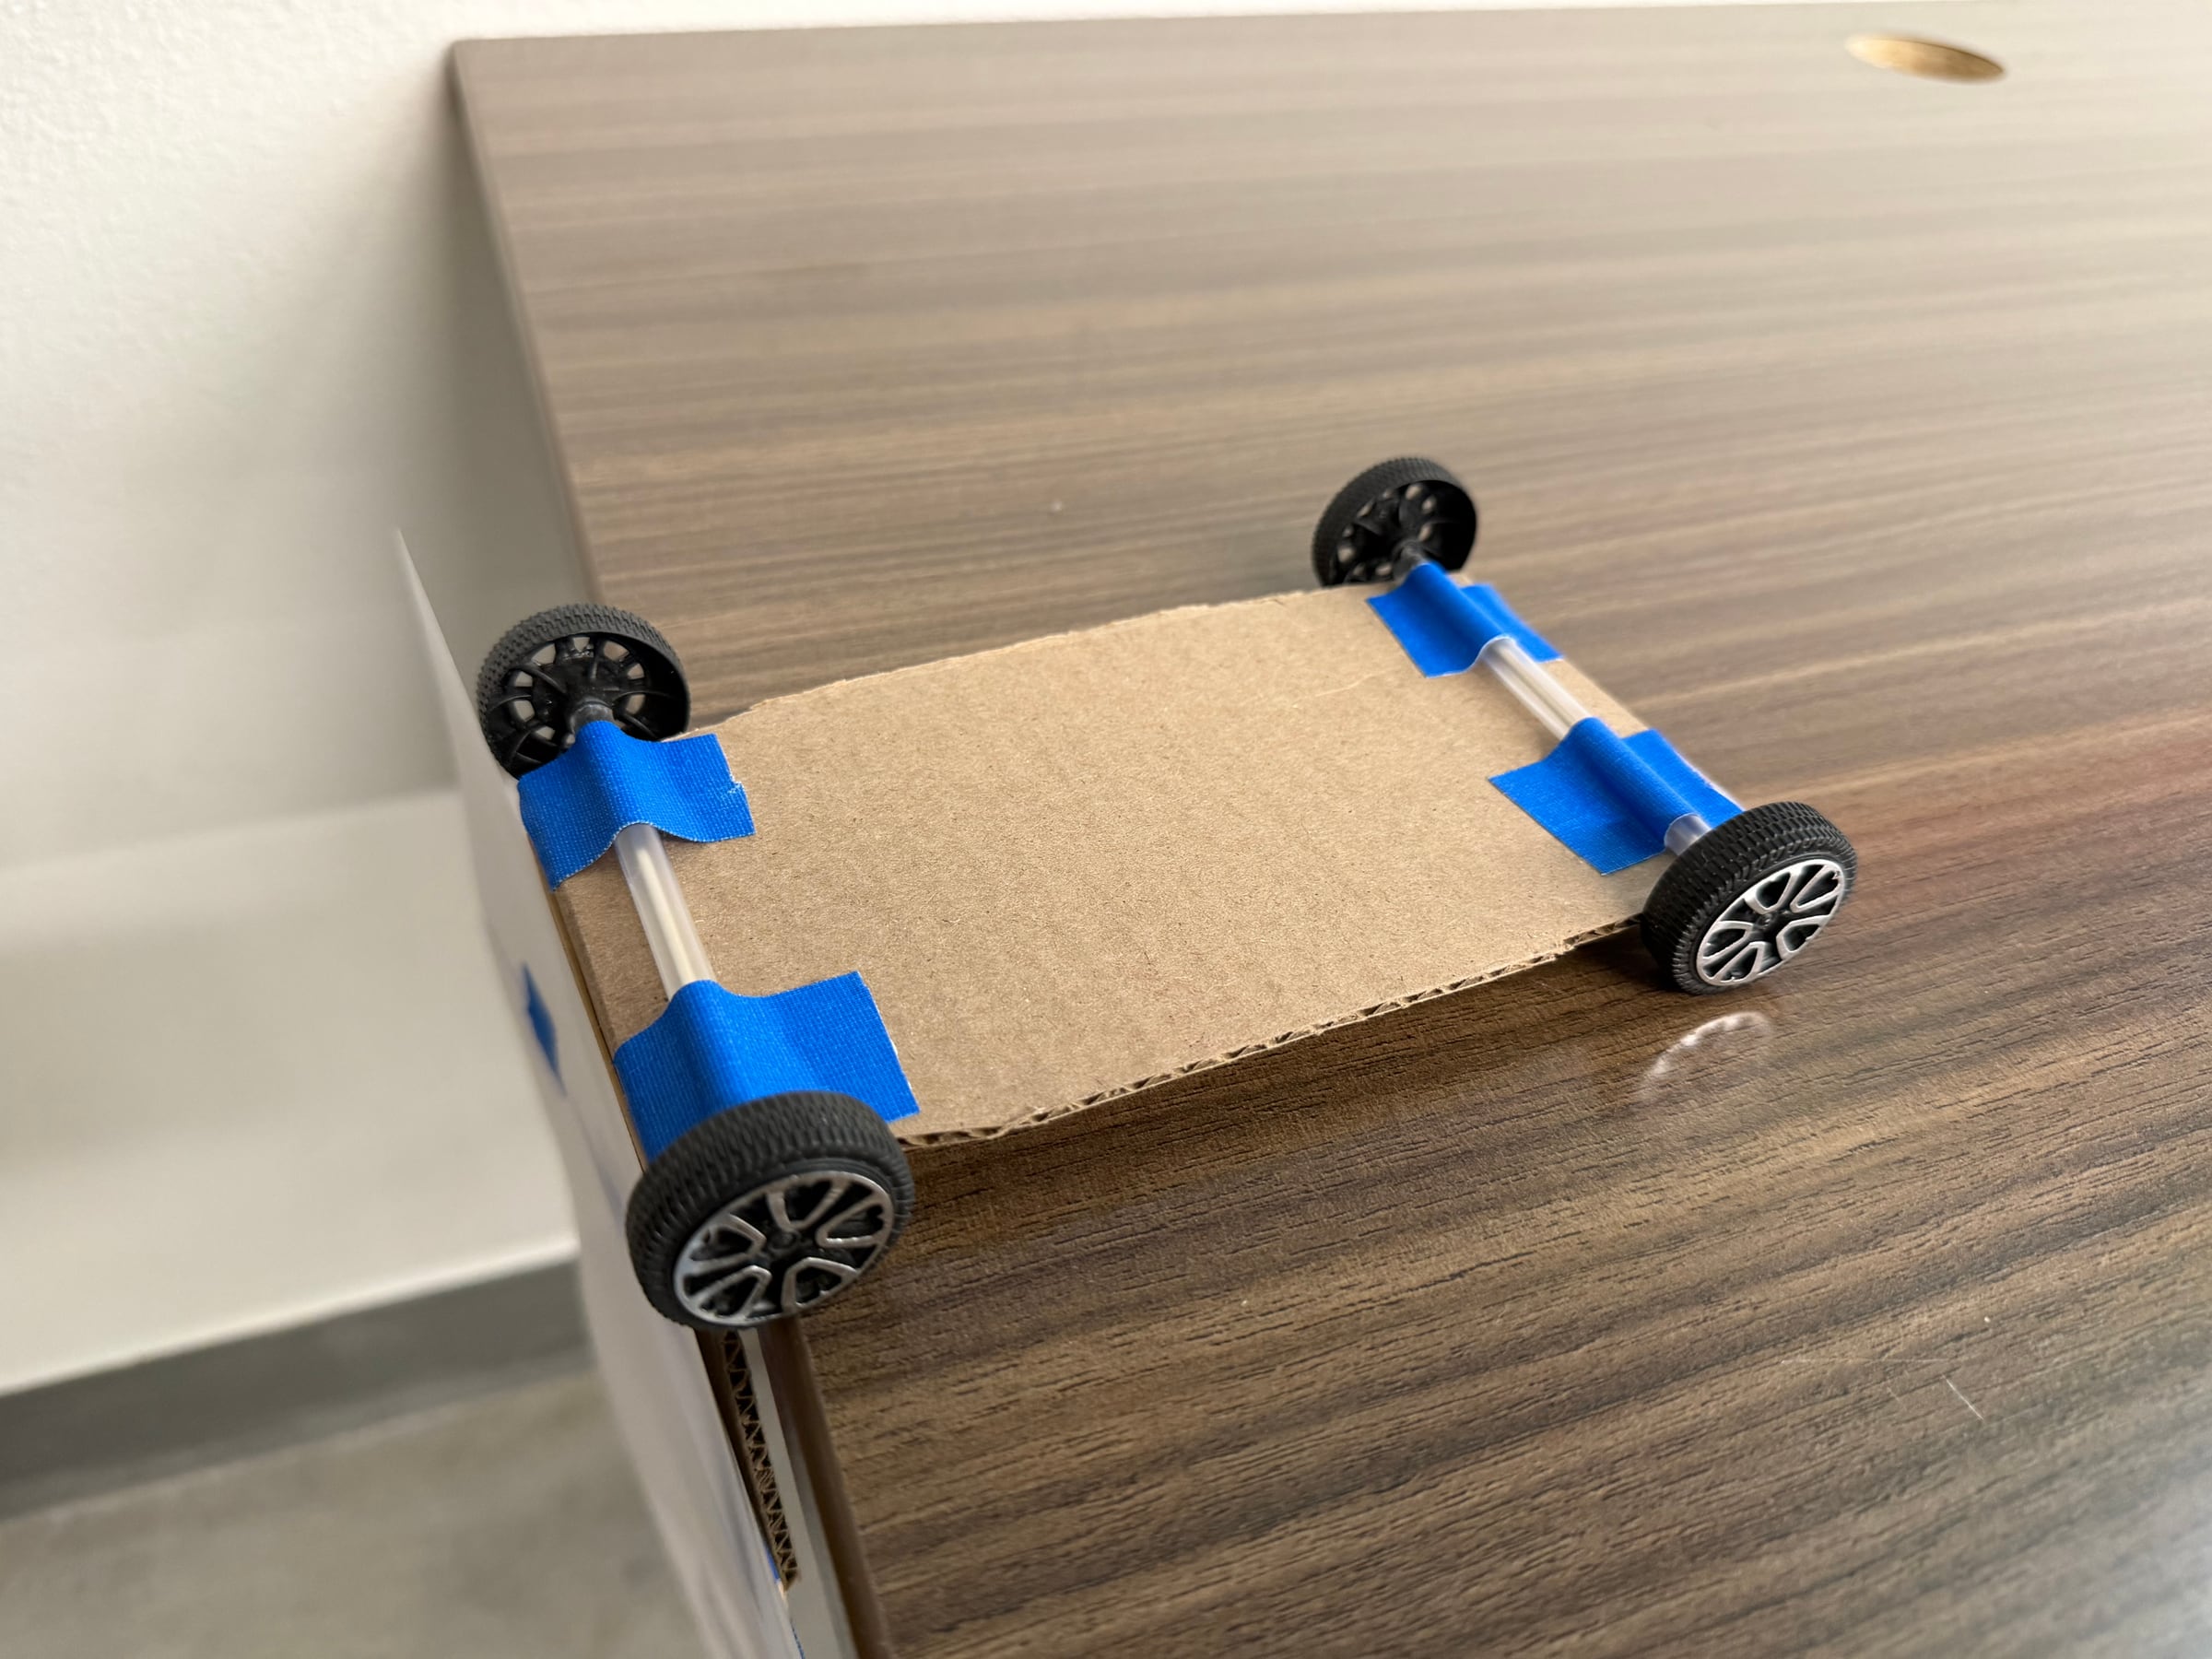
From underneath, students can see that the straws hold the axles in place and that the axles run parallel across the cardboard body.
Prepare the Testing Hallway
Set up the course similarly to the paper-airplane testing hallway:
- Place the box fan at one end of a long, flat hallway or testing area.
- Mark a starting line with blue painter’s tape a consistent distance in front of the fan.
- Run two 25-foot tape measures from the starting line along opposite sides of the course.
- Keep the fan in the same position and use the same speed for every group.
- Assign a camp staff member to read and record the distance traveled by each car.
The two tape measures make the distance easy to read even if a car drifts toward either side of the hallway.
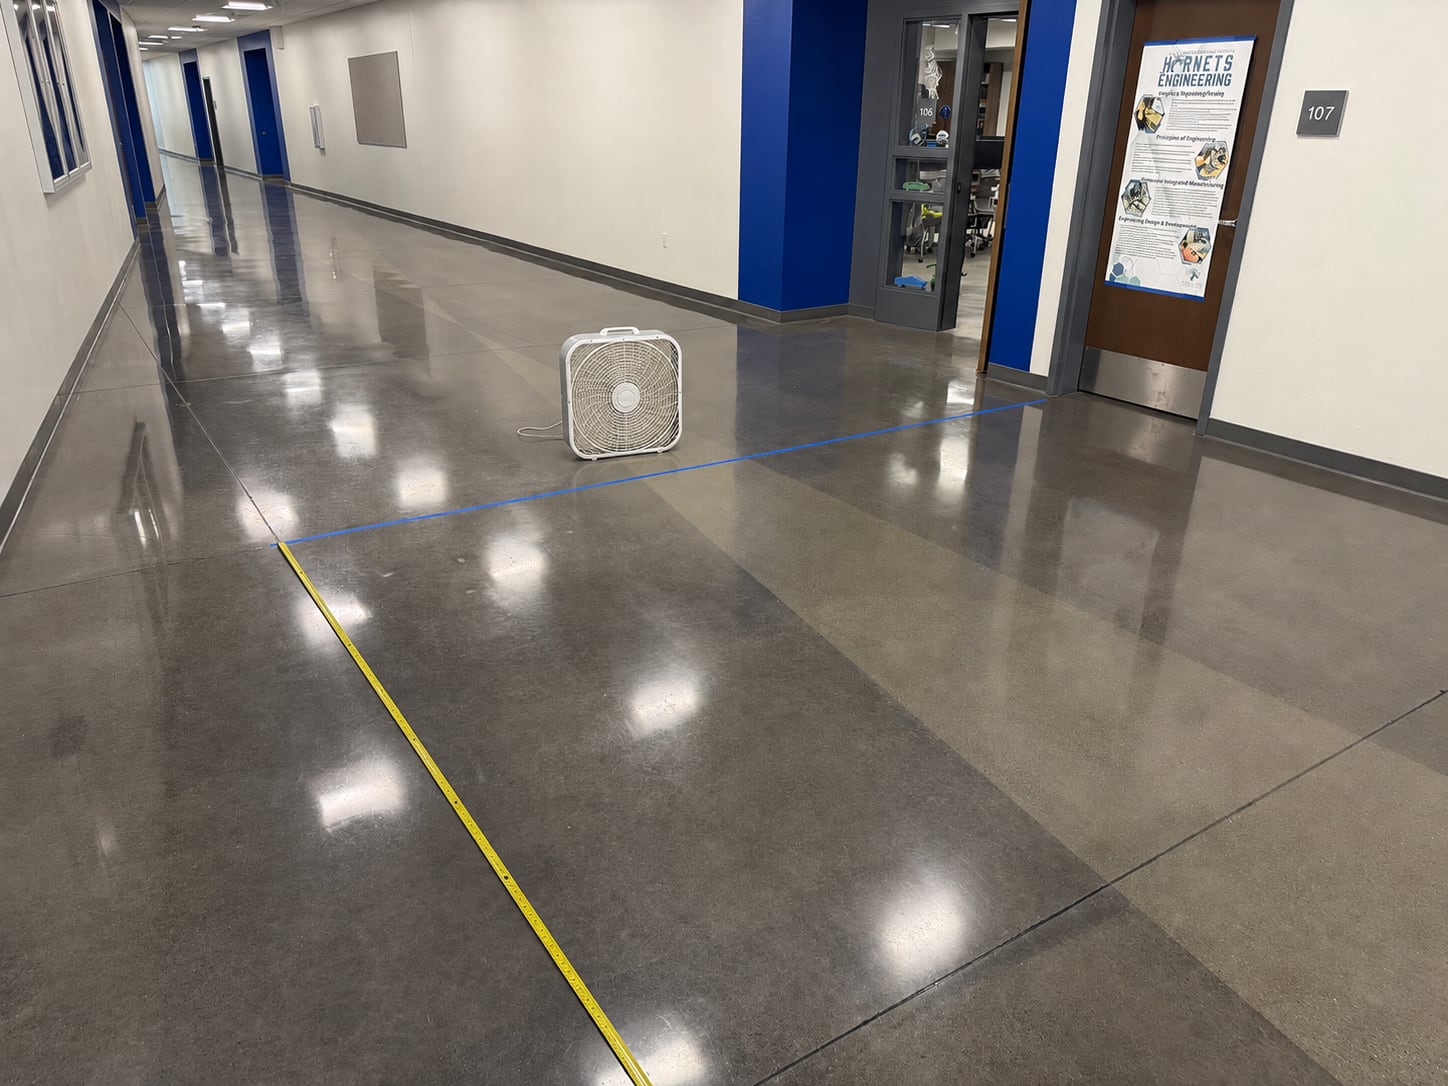
Our course placed the box fan behind the blue starting line with tape measures extending down both sides of the lane. Keep the fan, line, and measuring tools in the same positions for every group.
Teaching the Lesson
Show students the instructor-built car and ask what they think allows it to move. Point out the body, axle supports, axles, wheels, mast, and sail. Demonstrate that the wheels spin freely and that the paper sail gives the wind a surface to push against.
Make it clear that the demonstration car is only one functional solution. Students are not expected to copy it. Their challenge is to build the best car they can using only the limited cardboard, wheels, axles, paper, straws, craft sticks, and tape they received.
Explain that each pair should share construction decisions and tools. One partner might hold parts in alignment while the other tapes, measures, or tests the wheels, but both students should contribute to the design.
Demonstrating the Parts
Show the purpose of each major part without prescribing an exact design:
- Use cardboard to create a lightweight but sturdy body.
- Use straws as supports or bearings for the axles.
- Insert the two axles and attach four wheels.
- Check that the wheels spin freely and remain aligned.
- Use paper, craft sticks, straws, and tape to create a sail and support it.
- Test whether the finished car rolls before placing it in front of the fan.
Remind students to budget their tape. They have a limited amount, so every connection should have a purpose.
Building the Car
Give groups most of the 40-minute building period to explore their own solutions. Encourage them to begin with the rolling base before investing time in the sail.
The cardboard body should be strong enough to support the axles and sail but light enough to move. The two axles should be parallel, and the four wheels should rotate without rubbing against the body. Misaligned straws or bent axles create friction and can cause the car to turn instead of traveling forward.
After the base rolls smoothly, groups can use their paper, straws, and craft sticks to create a sail. A larger sail catches more wind, but it can also bend, add drag, or make the car unstable. Students should decide how to balance sail area, strength, weight, and stability.
Walk around the room asking questions rather than redesigning cars for students:
- Do all four wheels spin freely?
- Are the axles parallel?
- Is any part rubbing against a wheel?
- Does the sail stay upright?
- Where will the fan push on this design?
- Which limited material should your group save for later adjustments?
The goal is not for every car to look alike. The limited-material constraint encourages groups to prioritize, improvise, and learn from their own design choices.
Understanding Force, Friction, and Stability
Before testing, briefly connect the designs to the science involved.
The moving air from the fan pushes against the sail and transfers force to the car. The wheels and axles determine how easily the car can move across the floor. Friction from a rubbing wheel, crooked axle, or dragging body reduces the distance the car travels. A tall or off-center sail may catch plenty of wind but make the car unstable.
Ask students:
- What happens when a wheel is not straight?
- Which parts of the car create friction?
- How could the sail catch more wind?
- What might make a large sail less effective?
- How does the limited amount of tape affect your decisions?
Testing and Improving
During the building period, allow groups to perform brief trial rolls and, when practical, quick fan tests. Keep the fan position and speed consistent so changes in performance come from the car rather than the test conditions.
After an early test, encourage each group to identify one problem and make one focused change. They might straighten an axle, move a wheel, reinforce the sail, reduce weight, or adjust the sail’s size or position.
Save enough time to move everyone to the hallway and begin the final challenge at the end of the 40-minute building period.
Final Distance Challenge
Use the final 20 minutes for testing. Run one group at a time so every car experiences the same airflow and the distance can be measured clearly.
For each group:
- Place the car behind the marked starting line in the same position used for every team.
- Make sure the fan remains at the chosen speed and location.
- Turn on the fan or uncover the airflow using the same procedure for every attempt.
- Allow the car to travel until it stops.
- Use the closer of the two tape measures to read the distance from the starting line.
- Have a camp staff member record the group’s name and distance.
- Remove the car before calling the next group.
Compare the recorded distances after every group has tested. The car that travels the farthest is the challenge winner.
Keep the result connected to engineering. Ask the winning group which design choices they think helped, and recognize groups that solved difficult problems or made especially effective improvements during the build.
Reflection
After the challenge, ask:
- What worked well in your group’s design?
- What would you change with another build period?
- Which material was most useful?
- How did the limited supplies affect your decisions?
- Which change made the biggest improvement?
- Did the car travel as far as you expected?
Cleanup
- Turn off and unplug the fan.
- Roll up both tape measures.
- Remove the painter’s-tape starting line.
- Collect reusable wheels, axles, straws, and craft sticks.
- Dispose of damaged cardboard, paper, and tape.
- Return shared scissors and tools.
- Save the instructor demonstration car for future sessions.
- Keep the recorded results if you want to compare future groups.